Showing posts with label paper. Show all posts

Sunday, May 13, 2012

Happy Mother's Day! Paper Bag Envelope Tutorial


So, for part of the mother's day gift, my sister, dad, and I wrote letters for my mum. Though naturally the only person who knows where the envelopes are is my mom. So I had to make envelopes out of paper bags. Not the big kind; the small ones that are used for sack lunches.


Materials: brown paper bag (one bag makes 2 envelopes), scissors, glue


Open up the bottom like so.


You now have a paper tube.
Cut up the side folds.

You now have 2 of these. Set one aside for later for your 2nd envelope.


Flatten the bottom.


Round both ends of the rectangle (you could do a different shape for the flap, but I prefer it round).

Fold up the bottom however high you'd like it.

Fold down the top. Now unfold.

Cut the flaps off from the bottom fold down to the end of the flap.


Now cut the flaps off from the top fold up the the end of the flap. Round the 2 remaining flaps.


This is what the whole piece, unfolded, should look like.

Glue the bottom onto the flaps.


And... you're done! Easy as pie. I've actually never understood that phrase. Making pie doesn't seem easy. Maybe they mean as easy as eating pie. For me, eating pie is pretty easy.

On an unrelated note, I made this cool star paper lantern. A teacher taught me how. It's currently holding a yogurt cup that would be cool to use as a planter.


Happy Mother's Day, everyone!

(o^__^)o

Saturday, December 17, 2011

Brown Paper Packages tied up w/ String: Tutorial


Dunno why I'm posting this... Guess because Christmas is coming!!! This is an easy way to wrap a gift without tape. I love the vintage look the twine and brown paper provides. I know I'd want a package wrapped in brown paper and string...

Materials: brown wrapping paper (kraft-type paper), string, scissors

Cut out a large sheet of paper. Place your gift in the center.
Fold the sides in towards the center over your gift.

Fold the bottom up.

Fold the top down.

Tuck the bottom flap into the top flap and wrap with string.

Go give someone a present.

o(^__^o)

Sunday, December 4, 2011

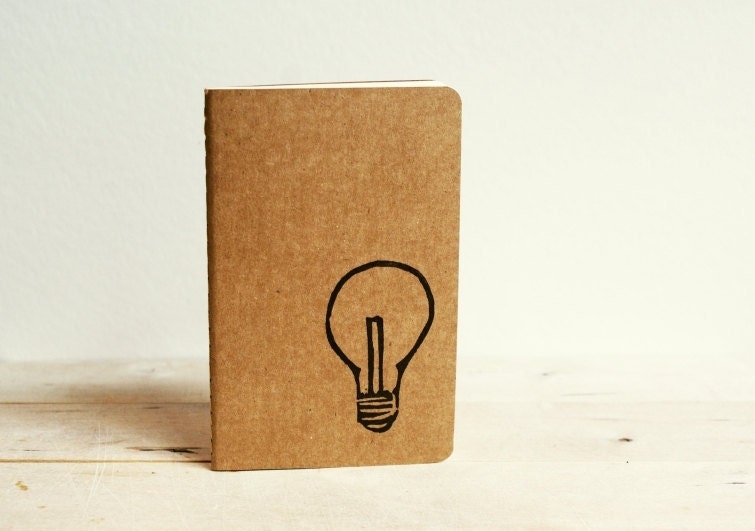
Lightbulb Notebook

A little notebook for all your 'bright' ideas, heh heh (I know, I know; I'm so clever)...

Based on this notebook from etsy and this tutorial.
Made out of a Cheez-It box and handsewn together after making holes with a thumbtack. What a pain. :/ The lightbulb was drawn on with Sharpie. :)

Probably going to become a Christmas present. Have a great day!

(22 days till Christmas!)

(o^__^)o

Tuesday, June 14, 2011

Glossy Gum Wrapper Chain Paper Bracelet Tutorial


I had another blog when I was about 10-11 (that blog is kind of embarrassing so i won't tell you what it's called, but it was on wordpress). I posted this same project, except with different paper. Unfortunately, the picture doesn't show up because I never knew how to upload pictures. Sadly, I lost my last bracelet. I thought it was really cool, and it was. Teachers and friends complimented it. And then, I left it on a bookshelf, and it was stolen. In other words, I lost it. So, here's my new tutorial, complete with accessible pictures. I'm sure some adults have done the same thing with gum wrappers; my dad taught me this, saying he used wrappers. I've tried using gum wrappers, but for me they're just way too small for this project. So...

Materials:
-2 pieces of 12" x 12" scrapbooking paper (not cardstock, it's too stiff); i got mine from Michaels for 25 cents each paper, so 50 cents for 2 pcs
-scissors, or if you're lucky a paper cutter
-ruler
-mod podge (optional, but it adds a nice shine and makes it more durable)


1. On one edge going across the top, mark the paper on the back every 2." You should have 5 marks and 6 sections.

2. On the other edge going up and down, mark the paper every 4 and 1/2." You should have two marks and 2 sections.

3. On the edge opposite of the 2" marks, repeat step 1. On the edge opposite of the 4 and 1/2" marks, repeat step 2.
4. Using the ruler, connect the 2" marks together and the 4 and 1/2" marks. You should now have a grid of 2 x 6. See that long piece at the bottom in the 2nd photo? You can trim that off. It'll be about 3" x 12." You can throw it out, but I'd keep it for now.


5. Now cut along the grid lines so you have pieces of paper 4 and 1/2" x 2." I like to crease along the lines and then cut along the creases. Repeat with the other piece of paper so you have a pile of paper like this.


6. Take one piece and fold it in half lengthwise.

Now fold the 2 edges to the center like so...


And now fold it in half again lengthwise.


7. Now fold it in half so there are 2 long 'arms'...
and fold those to the center. You should have this.


Repeat with the other pieces of paper. I needed about 22 pieces, you may need less or more.
8. To connect them, insert the 2 arms into the folds of another piece like so and pull through:


You get this.

9. Repeat with another piece. This is how I do it sometimes, insert one arm and pull it through, and then bend the other one through the other slot.


10. Repeat till it's as long as it goes around your wrist.


11. For the clasp, fold a piece and then unfold the arms.


12. Now put it through the slots like regular, and fold the arms around the first link and into the slots on the other side.


(as you can see, the brown paper, which is the last link, wraps its arms around the first link and you fold them into the slots--that's a view from the top)

13. Mod podge if you wish for a glossy finish and you're done! Makes a cool present, even for non-jewelry wearers-- I'd know because I'm one of them! Have a fantastic week!


(if you can tell in these pictures, the bracelet is giving off a bit of shine from the modpodge :))


(o^__^)o

(o^__^o)

o(^__^o)